Main Courses
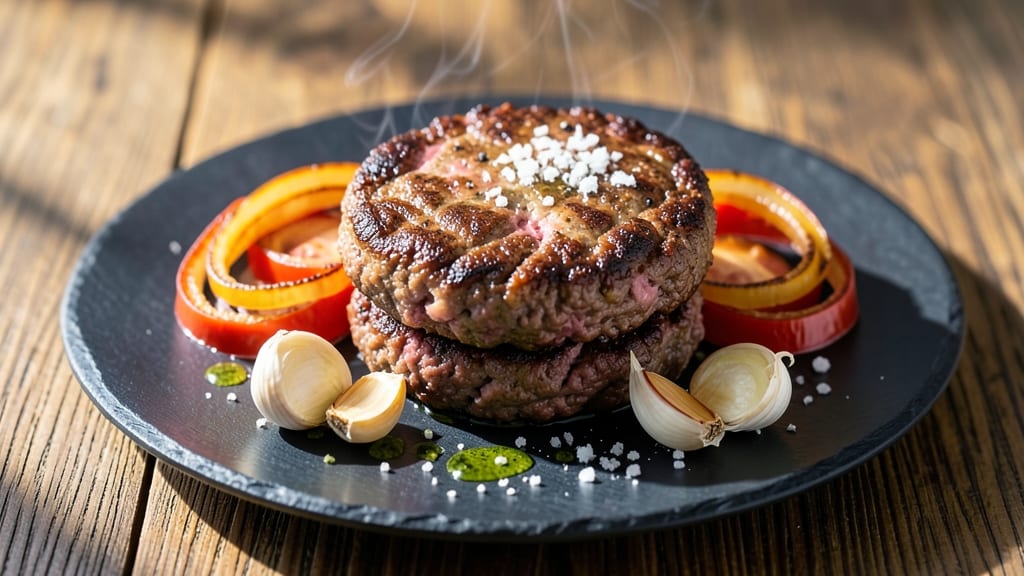
A 90/10 ground beef burger recipe delivers the ultimate balance of flavor and juiciness without requiring fat trimming—a game-changer for anyone who’s struggled with dry, tough burgers. The secret lies in the meat’s natural fat content, which keeps each bite tender and rich while developing that coveted charred crust.
I’ve perfected this method over countless grill sessions, and it never fails to impress, even with picky eaters.
What sets this recipe apart is the foolproof technique for handling the beef: gentle shaping, proper seasoning, and precise cooking temperatures. No need for fancy equipment—just a cast-iron skillet or grill, and you’ll achieve burgers with a crispy exterior and a moist, flavorful interior every time.
The key is cooking to an internal temperature of 160°F, ensuring safety without sacrificing juiciness.
By the time you’re done, you’ll have burgers that are dangerously addictive—succulent, savory, and packed with that irresistible smoky char.
The beauty of this recipe is its versatility: customize with cheese, caramelized onions, or your favorite toppings, and pair with classic burger buns or crisp lettuce wraps for a lighter option.
Whether you’re grilling for a crowd or treating yourself to a solo meal, this method guarantees restaurant-quality results with minimal effort. Let’s get started—your taste buds will thank you.
Ingredients for 90/10 ground beef burger
Fourteen ingredients for burgers that taste like a high-end steakhouse—no fancy tricks, just perfect technique.
| Ingredient | Amount | Notes |
|---|---|---|
| 90/10 Ground Beef 🥩 | 1 ½ lb | Freshly ground, chilled for shaping |
| Yellow Onion 🧅 | 1 whole | Finely diced, for caramelized onions |
| Garlic Cloves 🧄 | 4 cloves | Minced, for depth of flavor |
| Diamond Crystal Kosher Salt 🧂 | 1 ½ tsp | Fine grain for even seasoning |
| Freshly Ground Black Pepper 🌶️ | 1 tsp | Cracked peppercorns preferred |
| Extra-Virgin Olive Oil 🫒 | 1 tbsp | For greasing hands and skillet |
| Unsalted Butter 🧈 | 2 tbsp | For basting, full-fat preferred |
| Burger Buns 🍞 | 4 whole | Toasted, sesame seed preferred |
| American Cheese Slices 🧀 | 4 slices | Optional, for classic topping |
| Fresh Lettuce Leaves 🥬 | 4 whole | Iceberg or romaine, for crunch |
| Tomato Slices 🍅 | 4 slices | Ripe, for freshness |
| Pickle Slices 🥒 | 4 slices | Dill or bread-and-butter |
| Yellow Mustard 🟡 | 2 tbsp | For spreading on buns |
| Ketchup 🍅 | 2 tbsp | Classic pairing |
The 90/10 ground beef is non-negotiable here—this fat-to-lean ratio is what delivers that melt-in-your-mouth texture. Butcher shops often have it pre-ground, but if your grocery store doesn’t carry it, ask them to grind it fresh from a chuck roast (the fat marbling is key). Keep the meat cold while handling—wet your hands with water or use a little extra-virgin olive oil to prevent sticking. The onions? Sweet yellow or Vidalia caramelize best, but whatever’s on sale works too. Just make sure they’re finely diced—you want them to melt into the beef, not stay as chunks.
No kosher salt? Diamond Crystal is the gold standard, but any fine sea salt works in a pinch. The freshly ground black pepper makes a huge difference—pre-ground loses its punch fast. Short on time? Toast your peppercorns in a dry skillet for 30 seconds first—it deepens the flavor. Cheese optional, but if you skip it, add a sprinkle of smoked paprika right before serving for that smoky char. The lettuce and tomato can be prepped ahead—they just need a quick rinse before assembling. Pickles? Trader Joe’s dill slices are my go-to, but any tangy pickle works.
Burgers taste even better the next day, so make a double batch and freeze extras. Wrap each patty in parchment paper, then in plastic wrap, and they’ll stay fresh for up to 3 months. For the buns, toast them just before serving—cast-iron skillet or toaster oven both work. The secret to crispy buns is butter: melt 2 tbsp unsalted butter in the skillet and toast them for 1-2 minutes per side. Leftovers? Crumbled burgers reheat beautifully in a skillet or air fryer—just add a splash of beef broth to keep them moist.
Why You'll Love This Recipe
- This is my go-to for everything: a quick lunch, a tailgate spread, or when I’m too tired to think. Double the batch, freeze half, and you’ve got burgers for lazy Mondays or sudden cravings. The 90/10 keeps them rich without needing fancy toppings—just throw them on the grill or pan.
- No-Fuss Prep: I swear, this is the burger that lets me skip the "I don’t have time" excuse. Just pulse the onion and garlic in the food processor, mix with the beef, and you’re done—no shaping stress, no overhandling. The fat in the 90/10 keeps it juicy even if you’re not a burger artist.
- That Fat Matters: Honestly, the 10% fat isn’t just for flavor—it’s the secret to a burger that doesn’t dry out. The onion and garlic mellow into the beef while the salt and pepper caramelize just enough to give every bite that almost homemade-but-better depth. (Yes, even my picky husband nods at this one.)
- Weeknight to BBQ Hero: This is my go-to for everything: a quick lunch, a tailgate spread, or when I’m too tired to think. Double the batch, freeze half, and you’ve got burgers for lazy Mondays or sudden cravings. The 90/10 keeps them rich without needing fancy toppings—just throw them on the grill or pan.
Step-by-step instructions for juicy 90/10 ground beef burgers
Here's how to craft burgers with perfect texture and flavor—no fat trimming required.
Prepare the Beef Mixture for Maximum Juiciness
Place the 1.5 lb 90/10 ground beef in a large mixing bowl. The higher fat content (10%) is your secret weapon—it keeps burgers moist while creating that perfect char. Using your hands (lightly greased with 1 tablespoon extra-virgin olive oil), gently form the beef into a loose mound without overworking it. This prevents tough, dense patties.
Add the finely diced yellow onion and minced garlic cloves, then sprinkle over the 1.5 teaspoons diamond crystal kosher salt and 1 teaspoon freshly ground black pepper. Mix just until combined—you should still see streaks of beef throughout. The onions and garlic will caramelize slightly during cooking, adding depth without overpowering the beef's natural flavor.
Shape and Chill for Perfect Cooking Control
Divide the mixture into 4 equal portions (about 5 ounces each). Using your hands, gently shape each portion into a ¾-inch thick patty with slightly tapered edges—this prevents bulging. Press a shallow dimple in the center of each patty to prevent puffing during cooking. Real talk: don't press too hard or you'll compact the fat, which is what makes these burgers juicy.
Place the shaped patties on a plate and refrigerate for 30 minutes. Chilling firms up the fat just enough to maintain shape while cooking, but not so much that it loses moisture. This step is non-negotiable for consistent results—skipping it leads to uneven cooking and potential fat leakage.
Cook to Juicy Perfection on High Heat
Heat a cast-iron skillet over medium-high heat until it's screaming hot (about 425°F). Add 2 tablespoons unsalted butter and let it foam for 30 seconds before adding the patties. Cook for 3-4 minutes per side for medium-rare (internal temp 130°F), or until you see those beautiful deep brown crusts forming with light grill marks. The butter bastes the patties continuously, locking in moisture.
During the last minute of cooking, place the american cheese slices directly on each patty. Cover the skillet for 30 seconds to melt the cheese—this creates that classic gooey center while keeping the patty juicy. Remove patties to a clean plate and tent loosely with foil to keep warm. Here's the thing—don't press on the patties with a spatula while cooking. It squeezes out all that precious juice.
Assemble Burgers with Classic Toppings
Toast the burger buns on the same skillet for 30 seconds per side until golden brown. Spread 2 tablespoons yellow mustard on the bottom half of each bun, then layer with fresh lettuce leaves, tomato slices, and pickle slices. Place each cheese-topped patty on the lettuce and top with the remaining bun halves.
Serve immediately while the patties are still steaming hot. The combination of caramelized onions in the beef, melted American cheese, and crisp lettuce creates that perfect balance of textures and flavors. For extra moisture, you can brush the buns with a little more of the rendered beef fat from the skillet—just don't overdo it or your buns will get soggy.
Pro Tips For Making 90/10 Ground Beef Burger
- USE A COLD SPATULA: The 90/10 fat content makes these patties slick—press a chilled metal spatula into the meat before shaping to prevent sticking. I learned this the hard way after wrestling with a glob of beef that refused to hold together.
- SWEAT ONIONS LOW AND LONG: Slice onions thin and cook them in a dry pan over medium-low for 8–10 minutes until translucent but not browned. Rushing this step turns them bitter, and you’ll end up with a sad, watery topping instead of a caramelized punch.
- SALT THE MEAT TWICE: Add half your kosher salt to the raw beef first—it breaks down proteins and locks in moisture. Then, sprinkle the rest after forming patties for a crust that actually sticks. (Yes, even if you’re impatient like me.)
- REST PATTIES UNDER FOIL: After shaping, let them sit on a wire rack for 10 minutes before cooking. This evens out the temperature so they don’t shrink into hockey pucks mid-sear—your future self will thank you. (And no, covering them with foil now won’t help.)
Regional styles of 90/10 ground beef burger
Classic American Style
This is the burger style most people picture when they think of 90/10 ground beef patties—thick, juicy, and topped with all the classic fixings.
The key here is the American cheese melt that creates that signature gooey center, paired with crisp lettuce, ripe tomato slices, and tangy pickles. I always toast the sesame seed buns in butter until golden for that perfect crunch.
Serve with a side of crisp french fries or a simple coleslaw for that complete diner experience. 🍔
Kansas City BBQ Twist
For a smoky, bold variation, add ½ cup Kansas City-style BBQ sauce (like St. Louis Style) to your patties before serving. Top with crispy onion strings and a sprinkle of smoked paprika. The BBQ sauce adds a sweet and tangy contrast to the beef's richness.
Pair with toasted brioche buns for extra indulgence. This style works perfectly for summer cookouts where you want that smoky flavor without the full commitment of a brisket. 🔥
Texas-Style Smash
Take your burgers to the next level with the Texas smash technique: press the patties down hard with a spatula during the first minute of cooking to create a crispy crust. Top with crumbled blue cheese, caramelized onions, and a drizzle of chipotle mayo.
Serve on a toasted potato roll for that authentic Texas feel. The smash method gives you that perfect char while keeping the inside juicy—just don’t skip the 30-minute chill before cooking. 🌶️
Chicago-Style Cheeseburger
Chicago-style burgers are all about the cheese—layer 3 slices of American cheese on each patty and let it melt into a thick, gooey blanket. Top with diced yellow onions (cooked until soft), sweet pickle relish, and a dash of sport peppers for heat.
Serve on a poppy seed bun for that classic Chicago touch. The secret here is cooking the patties slightly underdone (130°F internal temp) so the cheese melts perfectly when they finish on the grill. 🧀
West Coast Lettuce Wrap
For a lighter option, skip the bun and wrap your patties in romaine lettuce leaves. Top with avocado slices, crisp cucumber ribbons, and a drizzle of spicy mayo. The West Coast style focuses on fresh, vibrant flavors that complement the rich beef without overpowering it.
This is perfect for health-conscious eaters or when you want to keep things light but still packed with flavor. 🥬
Southern Fried Burger
Give your burgers a Southern twist by coating them in cornmeal before frying in hot vegetable oil for a crispy exterior. Top with fried eggs, crispy bacon, and a drizzle of honey mustard.
Serve on a buttermilk biscuit for that true Southern comfort food experience. The fried crust adds a whole new texture that pairs perfectly with the juicy beef inside. 🍳
Nutrition facts
Frequently asked questions
Why does 90/10 ground beef make juicier burgers than 80/20?
The 10% fat content in 90/10 beef creates perfect moisture while cooking—it melts just enough to keep the meat tender without making the patties greasy. The key is shaping the patties gently and chilling them 30 minutes before cooking to maintain that fat distribution. Too much fat (like in 80/20) can lead to uneven cooking and a greasier texture.
Can I use 90/10 beef for other recipes besides burgers?
This leaner cut works great for meatloaf, stuffed peppers, or taco meat—just add extra moisture like broth or tomato sauce to compensate for the lower fat. For meatballs, mix in 1 egg and breadcrumbs to help bind the leaner mixture.
What's the best way to tell when my burgers are done?
Use a meat thermometer for accuracy—160°F is safe for ground beef. For medium-rare, aim for 130°F internal temp. The patty should also have a deep brown crust and light grill marks. Never rely on color alone—ground beef can still be undercooked looking brown.
How do I fix dry burgers if I overcook them?
If your patties turn out dry, try reviving them by placing them in a 350°F oven for 5-10 minutes with a splash of beef broth or water in a small baking dish. The steam will help restore some moisture. For immediate fixes, add a slice of American cheese and let it melt over the patty to add richness.
Can I make these burgers ahead of time?
Yes! Shape the patties and refrigerate them up to 24 hours before cooking. For longer storage, wrap them in parchment paper and freeze for up to 3 months. Thaw in the fridge overnight. The 30-minute chill before cooking is still important—just extend it to 1 hour if the patties are cold from the freezer.